Region 7 - Separation Enamel Workshop
In March, Region 7 was treated to a workshop on separation enamel by Mandy Fernandez. If experimental enamelling is your thing and you like expecting the unexpected, then this could be a technique for you!
Mandy began by showing us some examples of work she had done using separation enamel. She had some beautiful copper pendant pieces. The technique gave them an organic pattern with a slightly undulating surface like that of a tortoise’s shell.
The separation enamel looks like a reddish brown fine powder and should be mixed with water and a little klyr fire to a consistency in between single and double cream. A little goes a long way! It works by displacing the enamel when it is fired very hard, revealing the colour underneath, so contrasting colours work most successfully.
Having pre-enamelled our copper pieces with two coats of counter enamel, we sifted on a coat of opaque enamel and fired it; then a coat of transparent enamel in a contrasting colour which was also fired. Once the piece had cooled the liquid separation enamel was applied in a random pattern with a brush. We began with quite simple abstract dots and circular patterns which worked better than geometric designs.
When it had dried completely the piece was placed in a very hot kiln for about 2-3 minutes. Most of us felt quite uncomfortable leaving it in for that long. The harder the piece was fired the more the colours ‘separated’. Mandy told us that the separation effect would continue to increase with each firing. However, if the piece was fired at a lower temperature it should remain stable, which is a useful tip if you wanted to add something like silver foil on the final firing.
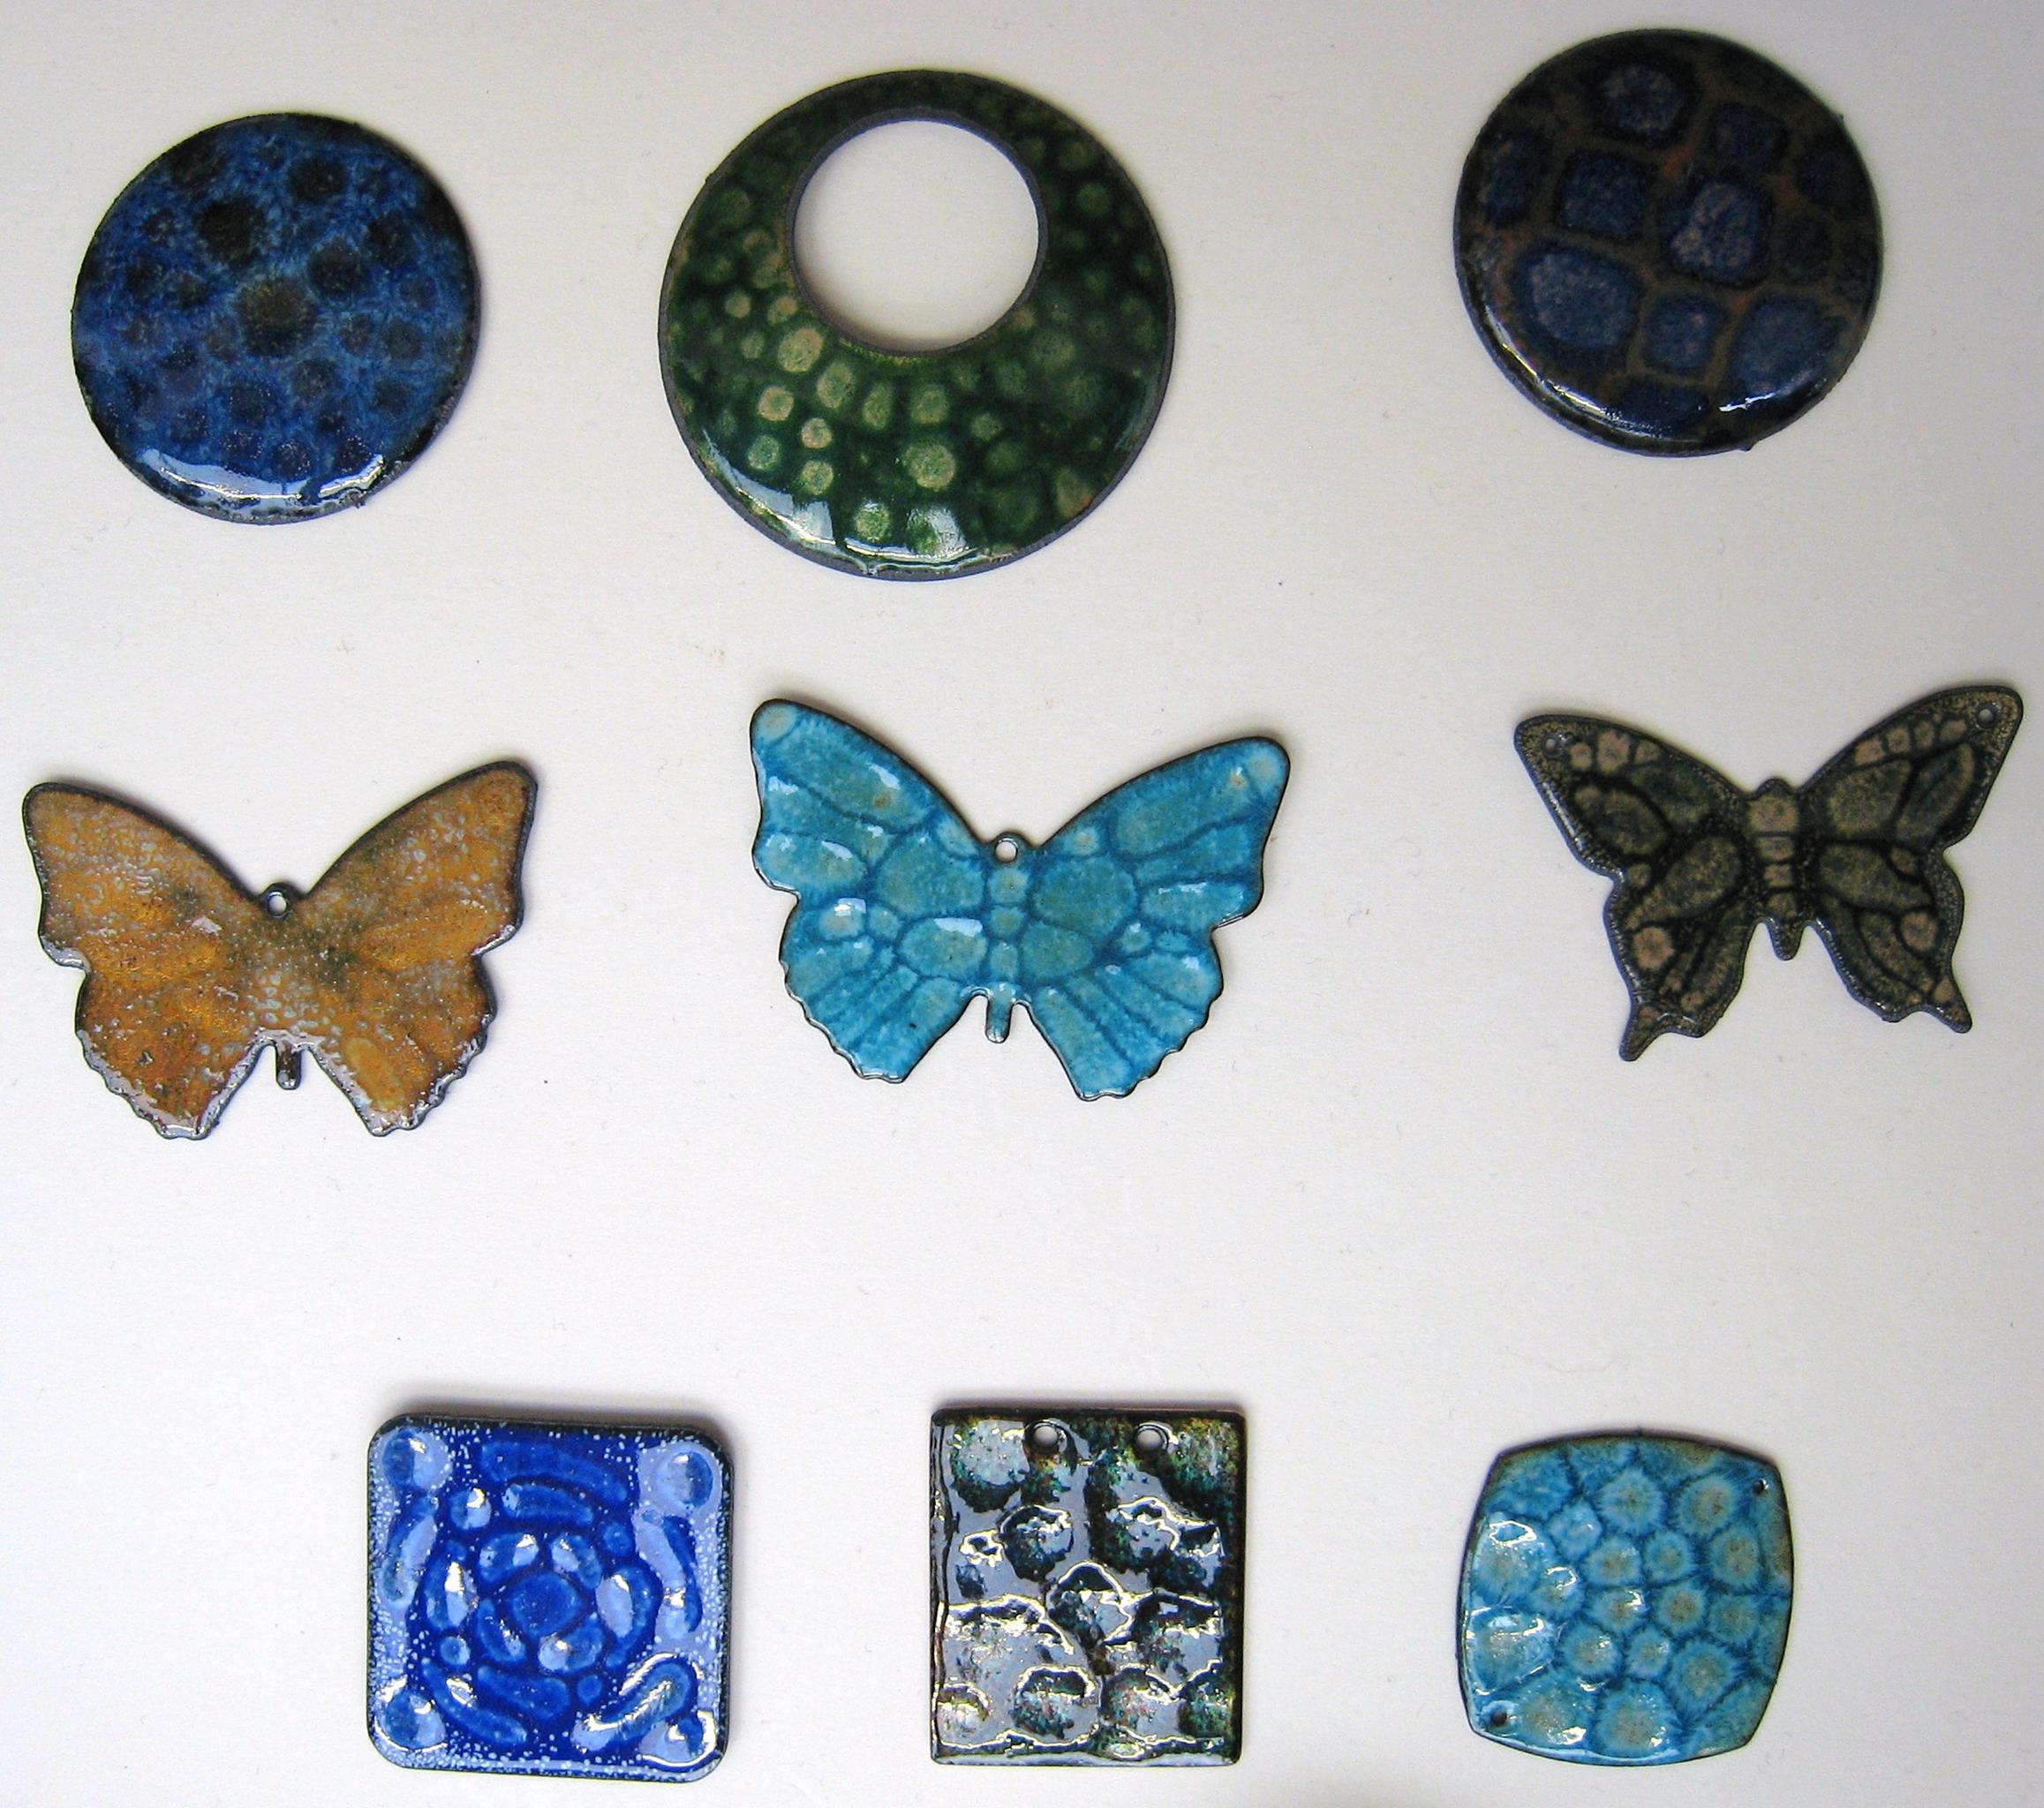
Pieces made at the workshop